Dutch Doors

Dutch doors are a practical way to connect indoor and outdoor space, giving the perfect solution for any application and climate. Most door styles can be turned into a dutch door, as long as it has solid wood across the area to be cut, like a flush door or a door with an intermediate rail. Dutch doors are a fit for both traditional and contemporary styles.

A shelf can also be added to a dutch door which provides a stylish and practical touch. Shelves are available in any type of wood and any width to match the door. Dutch shelf installation can be a do-it-yourself project or you can order your door from an Authorized Dealer with the shelf already installed.

There are two options for an Interior Dutch Door Shelf which are installed on the top of the bottom section of an interior door with a straight dutch cut.
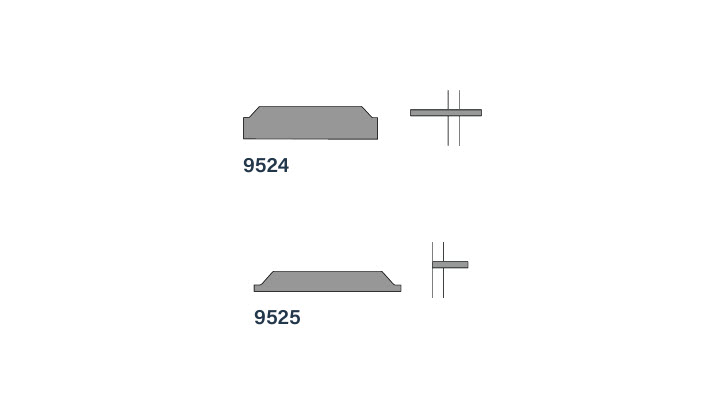
The 9524 is for an interior 1-3/8″ or 1-3/4″ thick dutch doors with a straight dutch cut that is 3/4″ thick and 8-3/4″ deep.

The 9525 is for an interior 1-3/8″ or 1-3/4″ thick dutch doors with a straight dutch cut that is 3/4″ thick and 4-3/8″ or 4-3/4″ deep.

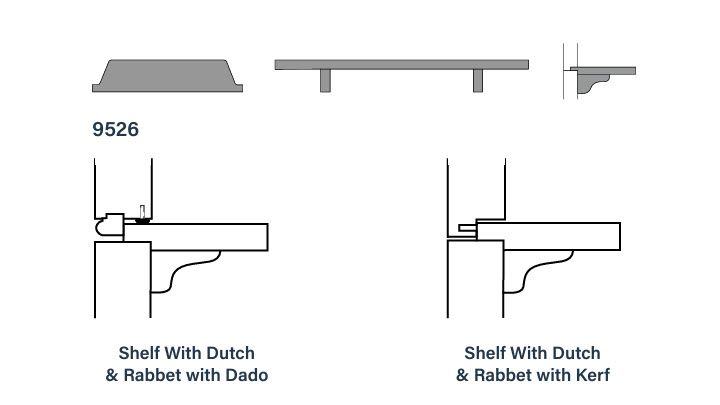
An Exterior Dutch Door Shelf would be installed on the top of the bottom section of an exterior door. The bottom of the shelf is pre-grooved to sit snugly on the bottom half of the door and the predrilled brackets support the shelf.

The 9526 is for an exterior 1-3/4″ and 2-1/4″ thick dutch doors with a cut that is 3/4″ thick and 7-1/8″ deep.

To create a weathertight seal, the top section should have either a Dutch and Rabbet with Dado cut or a Dutch and Rabbet with Kerf cut.

How to Install the Therma-Tru Lever Style Handleset

Tools Needed:

  • Interior plate
  • Exterior plate
  • Foam gaskets
  • Screws
  • Allen wrench
  • Handle
  • Spindle
  • Keys
  • Key cylinder
  • Plastic bushing
  • Set screws
  • Lock spindle tool

Step 1: Slide the foam gaskets into the handleset.

Step 2: Take the interior and exterior plates (1, 2) and place them on the door. Next, screw the plates into place with 2 screws (4).

Step 3: Line up the notches on the spindle (7). Push the spindle into the handle (6). Using the set screws (11), tighten them using the Allen wrench (5). Place the plastic bushing (10) onto the spindle.

Step 4: Place the handle into the door from the exterior plate side. Next, place the final set screw (11) and plastic bushing (10) onto the other handle (6) and push the handles together. Tighten the set screw with the Allen wrench (5).

Step 5: Using the lock spindle tool (12), find the small opening and push down to line up the key cylinder (9). It has to all be lined up to be pushed into the handleset.

Step 6: Using the longest screw, screw the key cylinder into place.

Step 7: Make sure to test the keys and mechanisms.

Step 8: These handlesets are universal, meaning the handing can be changed. To do so, take pliers and pull out and turn the latches to the correct handing needed for your door.


How to Complete the Door Unit After Install

Tools Needed:

  • Caulk Gun
  • Corner Pads
  • Screwdriver/Drill
  • Hinge Screws
  • Dollar Bill

Adjusting a Sill Cap

Step 1: Turn the screwdriver counter-clockwise to raise the sill.

Step 2: Using the Dollar Bill Method, check the resistance of the door. If the dollar bill comes out freely, than there isn’t enough resistance. If it comes out too hard, there is too much resistance.

Installing the Corner Pads

Step 1: Set a small bed of caulk between the sill cap and the jamb.

Step 2: Take the corner pad (Looks like a #7) and face the narrow side to the inside of the house. Remember to place it behind the weather strip.

Securing with Security Screws

Step 1: There are two sets of screws included with the door, one with a small screw head and a bigger one. These screws help to prevent door sagging with time. Test which screws would work well with your jamb. Those screws are the ones needed.

Step 2: Using a drill or screwdriver, drive the screws into the jamb.


How to Install a PanoLock Trim Set

Tools Needed:

  • Phillips screwdriver
  • Screw gun
  • Interior lever handle
  • Exterior lever handle
  • Inside thumbturn
  • Deadbolt electronic keypad
  • Mounting plate
  • Large Phillips-head screws
  • Small Phillips-head screws
  • Battery pack
  • Adapter kit

Step 1: First, select the adapter appropriate for the lock brand and type being used. You can reference the Endura PanoLock+ website to determine which adaptor is needed for your handleset and deadbolt type. Click here to visit the website enduraproducts.com/panolock-plus/

Step 2: For this demo, we are installing an electronic lock, but the procedure is similar for a standard deadbolt. We are also using the Square Drive Adapter. Simply remove it from the adapter ring.

Step 3: Next, install the lock adapter for your door knob/lever/thumb press into the COMPOSITE side of the door. Align the tabs on the adapter with the outer slots in the drive opening. Then push it in, until you hear a “snap” sound.

Step 4: Repeat the previous step, with the deadbolt adapter.

Step 5: To install the electronic keypad for the deadbolt, feed the wire underneath, and line up the thumb turn into the slot of the adapter, and push into place against the door.

Step 6: On the inside of door, install the mounting plate by first running the wire through the lower-left notch, set in place on the door, and hand tighten the screws, lining up with the outside keypad. Then tighten with a screw gun.

Step 7: To install the inside thumb turn, insert the 2 wires by pushing together, and press the whole piece against the door. Then insert the 2 screws and tighten.

Step 8: Install the battery pack from the top pushing down, then install the cover the same way.

Step 9: Next, insert the exterior lever handle in the bottom hole on the outside of the door.

Step 10: Finally, insert the interior lever handle in the bottom hole on the inside of the door. Add and tighten both screws.

One final note: Sometimes the door latch may be orientated the wrong way for the handing; however, they are universal so it can be fixed. If it is wrong, the door can be easily pulled open without any effort and without turning the handle because the latch is reversed. To correct this, take an allen wrench, loosen the set screw, and pull out the latch. Turn the latch 180 degrees, slide it back in, and tighten the set screw back up. After closing the door, it should not be able to open without turning the handle.


How to Install the Therma-Tru Grip-Style Handleset

Tools Needed:

  • Exterior handleset
  • Foam gaskets
  • Interior handleset
  • Plastic screw set
  • Handle
  • Screws
  • Cap
  • Plastic bushing
  • Keys
  • 6mm Allen wrench
  • Screwdriver
  • Needle nose pliers

Step 1: Slide the foam gaskets into the handleset.

Step 2: Place the exterior handleset (1) into the door and tighten the plastic set screw (4) into the handleset with the 6mm Allen wrench (10).

One note about step 3: Take a set of needlenose pliers, grab the spindle, and turn it to the position you need. For a right hand door, the spindle should be turned to the left. For a left hand door, the spindle should be turned to the right.

Step 3: Take the plastic bushing (8) and line it up with the spindle.

Step 4: Take the interior handleset plate (3) and line up the grooves with the plastic bushing. Then, use a screwdriver (11), to tighten the plate with the screws (6).

Step 5: Place the gray plastic bushing (8) onto the handle (5), then proceed to push it into place. Remember to test the mechanisms and keys!

Step 6: Screw the decorative cap (7) into place.


How to Replace an Astragal Spring Clip

Tools Needed:

  • 0.5” Allen Wrench
  • Screw Gun

Step 1: Pull off the cover piece by sliding your finger behind it and pull out.

Step 2: Using a 0.5 Allen wrench, loosen the set screw counter-clockwise.

Step 3: Using a screw gun, loosen the screw.

Step 4: With the screw loose, push up the slider and remove the spring clip by pulling down and out.

Step 5: Insert the new spring clip and line up the holes.

Step 6: Re-insert the screw back in, and use the screw gun to tighten.

Step 7: Next, push the flush bolt in to make sure it’s working properly.

Step 8: Retighten the set screw clockwise.

Step 9: Put the cover piece back in, by first squeezing it to fit into the kerf, and push back into place.

This process is for both the top and bottom astragal springs.


Cortex Hidden Screw System for On-Guard Frames

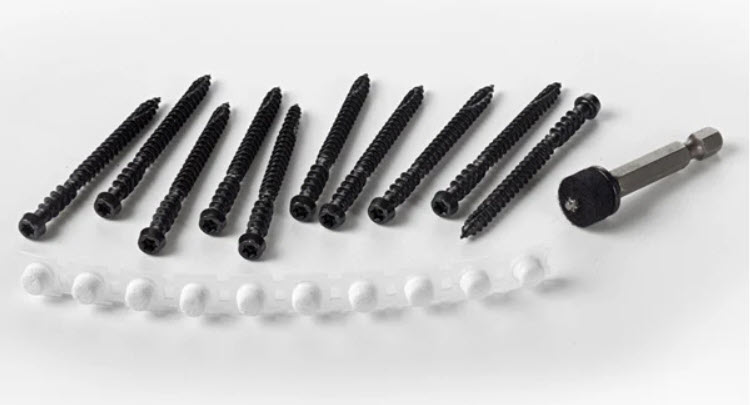
The Cortex Hidden Screw System hides unsightly screws, allowing the door unit to be installed in the rough opening with screws through the thickest part of the jamb for better long-term performance.

Each kit includes 10 Cortex screws, 10 On-Guard plugs, and 1 TORX screw bit that automatically sets the screw depth.

The hidden screw kit is available for Reeb Finish units with On-Guard frames. On-Guard Primed frames will use a smooth plug, while On-Guard Oak Grain and On-Guard Straight Grain frames will use a grained plug.

The plugs will be finished to match the finish of the frame. If an unfinished frame is selected, the plugs will remain unfinished.

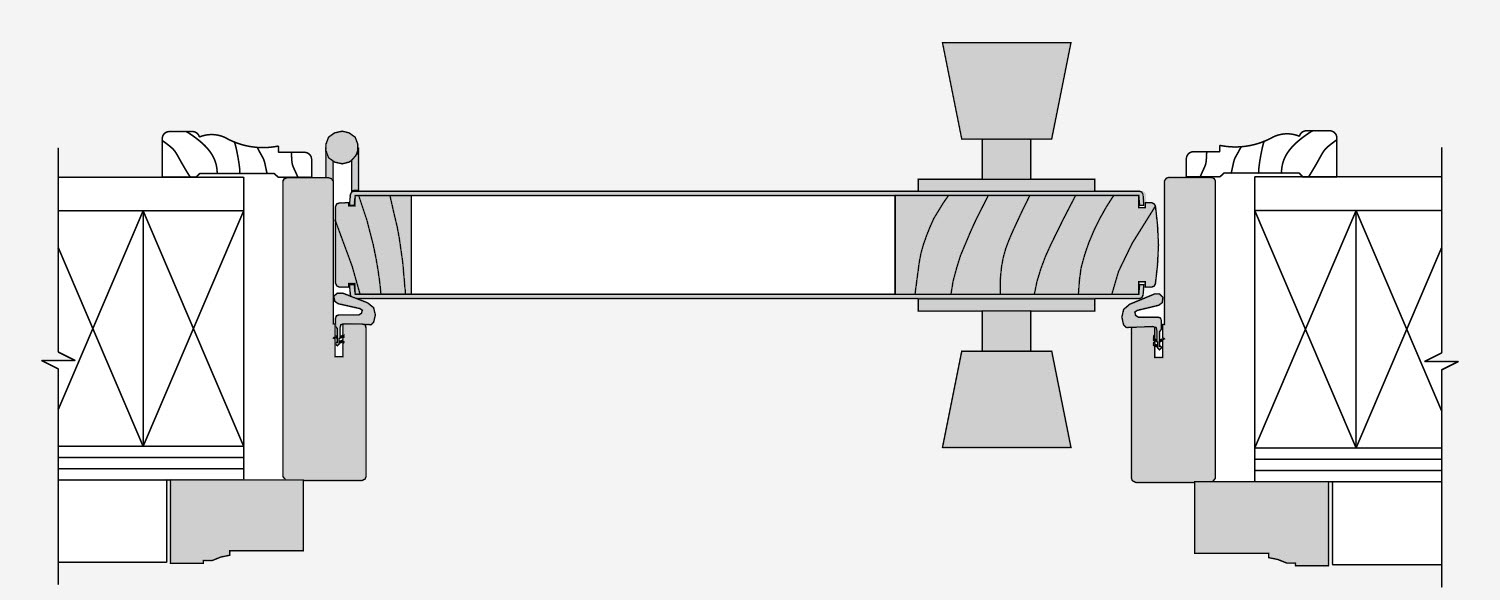
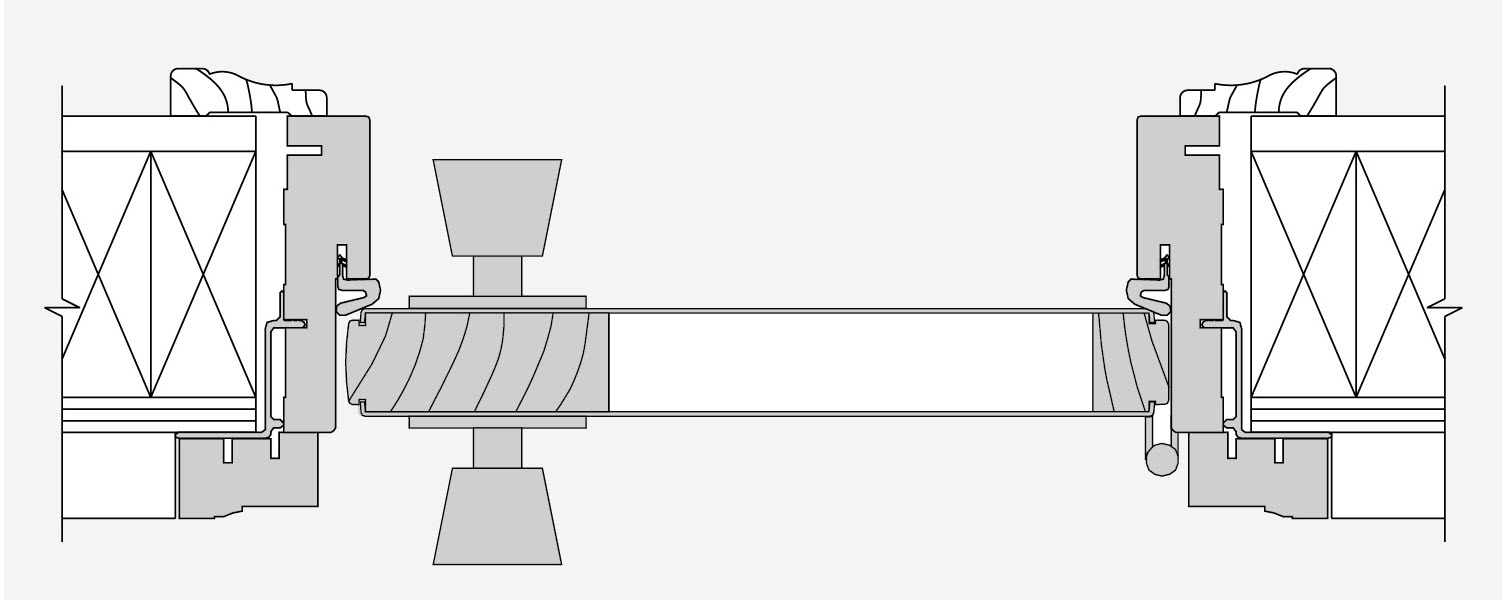
For split finish frames, the plugs will match the finish of the thicker 1-1/4” part of the jamb. For Inswing units, this will be the exterior frame finish. For Outswing units, the plugs will match the interior frame finish.

Inswing Unit

Outswing Unit

There is no restriction on the unit configuration with an option for a DP rated unit or one with an Impressions Storm door included.


How it’s Made: Simpson Nantucket Doors

Simpson Nantucket Collection doors are the toughest wood doors available. All the components of the Nantucket door are solid wood. The stiles and rails utilize a two-piece laminated construction, resulting in a straighter and more stable stile. This video showcases how a Simpson Nantucket Door with standard joinery option is made.


How it’s Made: Simpson Performance Series Doors

Simpson Performance Series doors include components that provide additional protection to your door in harsh weather conditions. They utilize three moisture blocking features and can be combined with a Medium Density Overlay (MDO) with water-resistant glazing beads and bars to create an exterior that stops water in its tracks. This video showcases how a Simpson Performance Series Door is made.


Securing a Double Interior Door

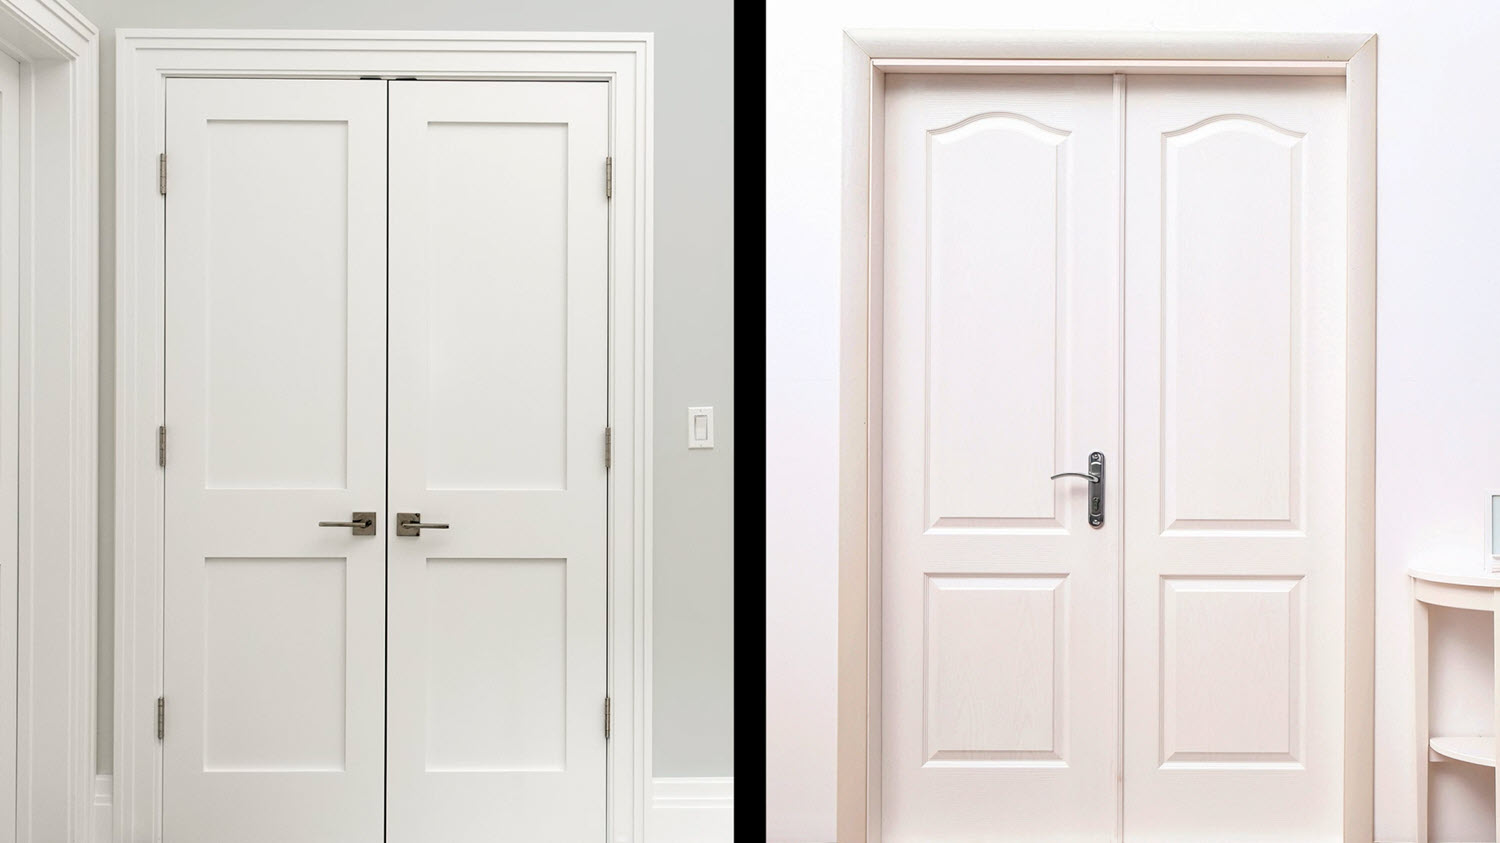
There are two solid options to keep interior double doors secure: Catches and Astragals.

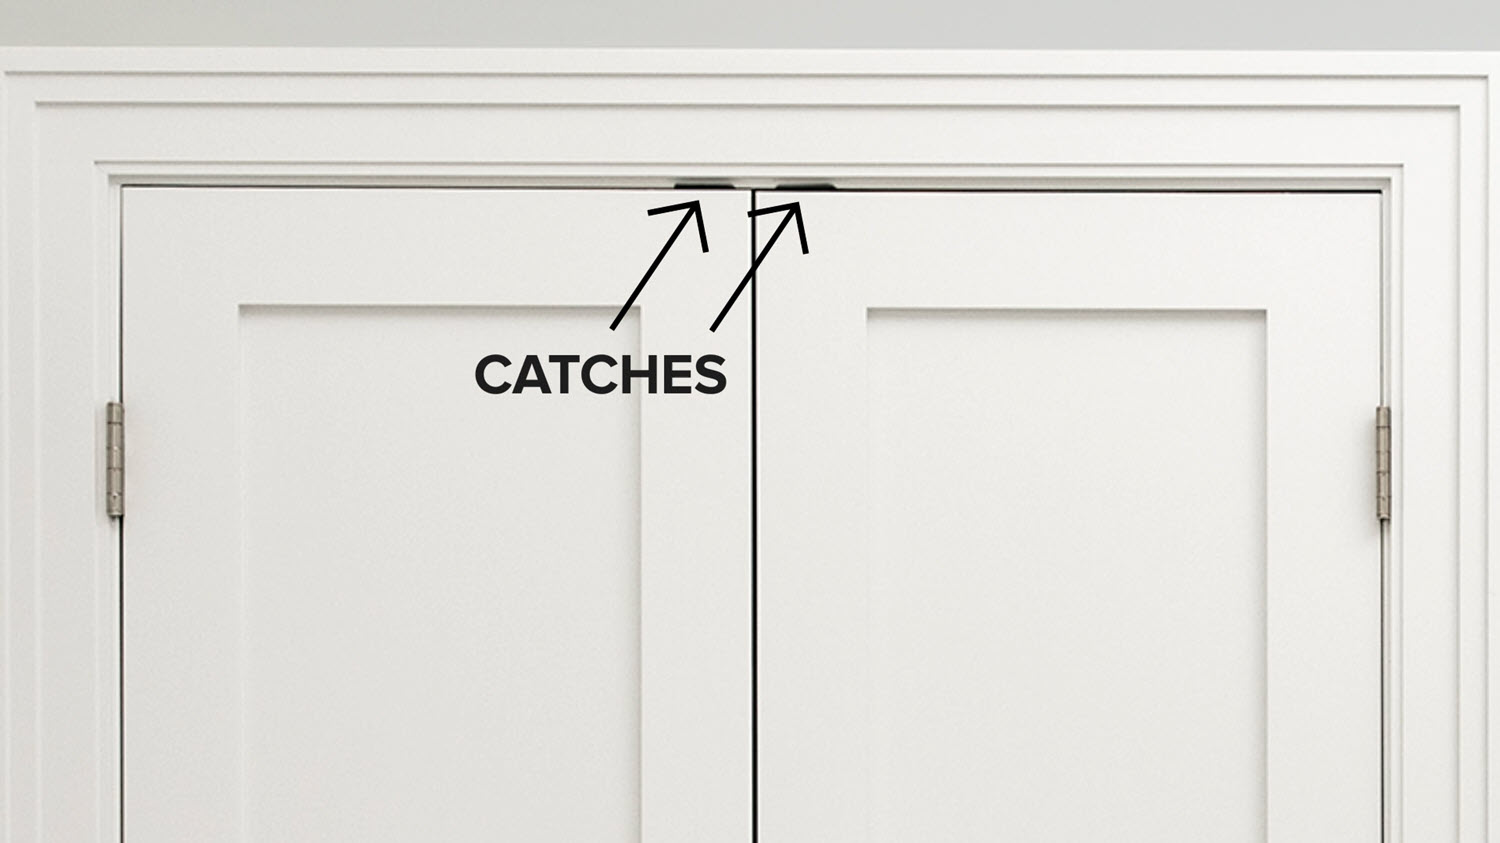
First up, we’re talking about Catches. Catches are super handy for when you want the freedom to open either door at any time.

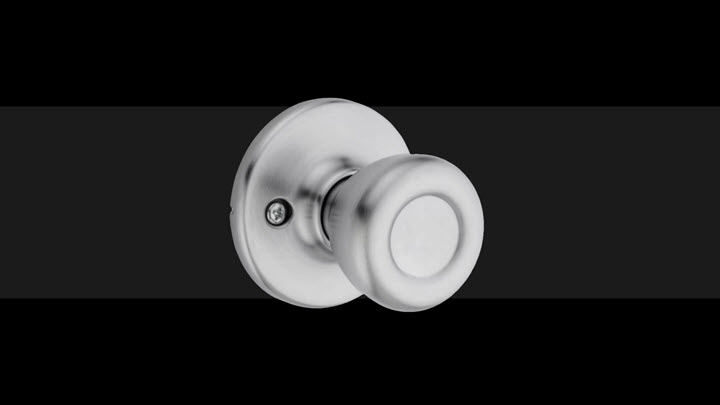
Most of the time, you will use something called a dummy knob with these because you don’t need a traditional doorknob with a latch.

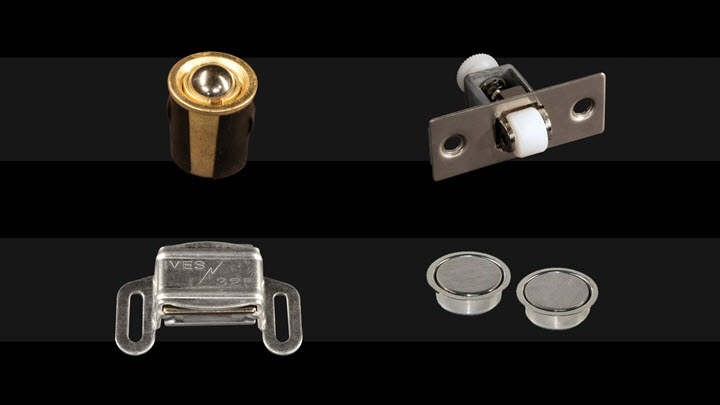
There are a few types of catches available such as ball, roller, and magnetic and they are installed at the top of your door.

Top: Ball Catch (L), Roller Catch (R)
Bottom: Magnetic Catch (L), Concealed Magnetic Catch (R)

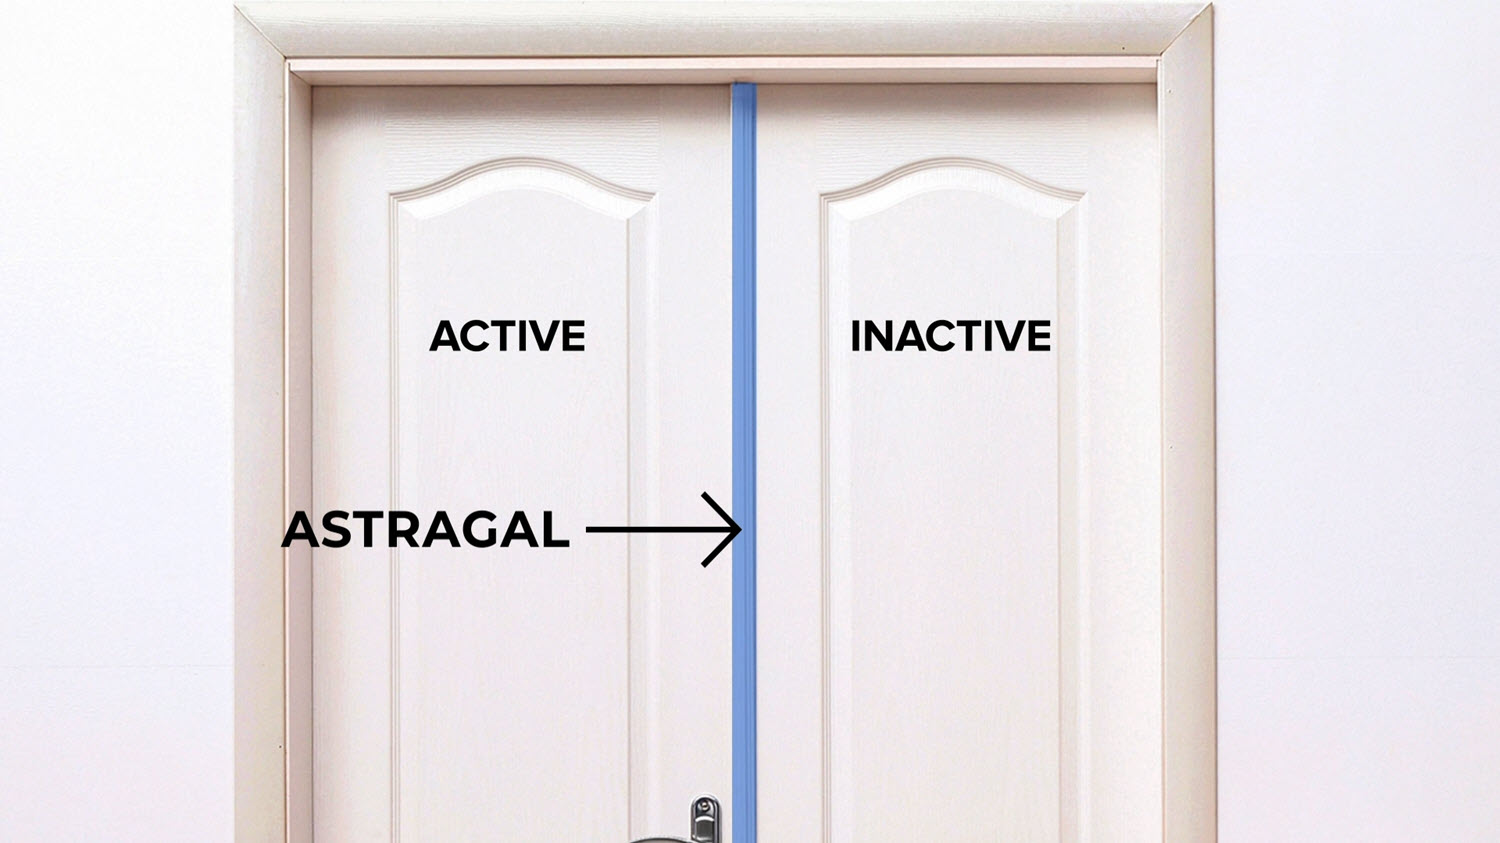
Now, switching gears to Astragals. When using an astragal, you pick one door as the active door which gets the doorknob. The other door is the inactive door and is where the astragal is installed.

Most astragals include a top bolt mechanism to keep the inactive door in place.

If you’re all about ease and flexibility, Catches are your go-to. Want a bit more control and security? Astragals have got you covered. Whichever you choose, you’re all set to make those double doors work just the way you need them to.