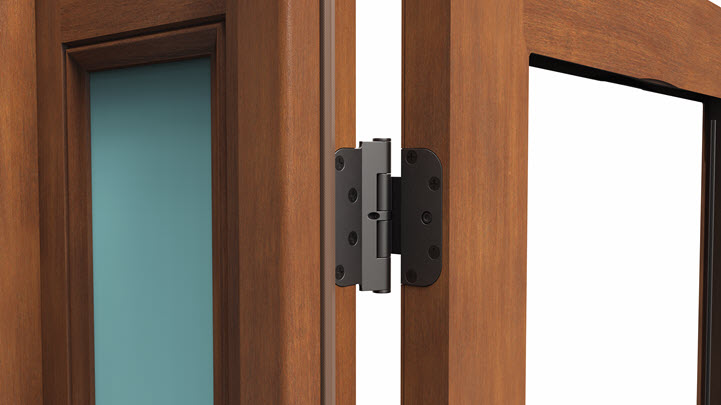
Genuine Therma-Tru® hinges position the door to properly compress the weatherstrip and help form a tight, even seal when the door closes. Over time, homes can settle unevenly and heavy doors can pull on hinges, causing the door to stick and rub. Adjustable hinges allow the door to be moved up and down, and side to side, in the frame to maintain alignment and help keep the door performing beautifully.
Product Information
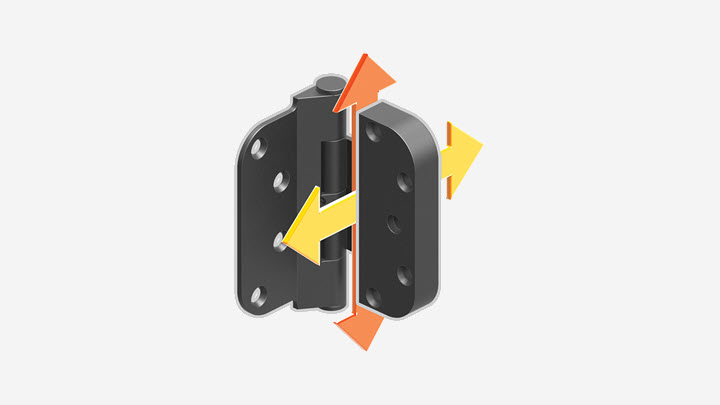
Adjustable hinges have two leafs joined together by a fixed pin. One leaf is a normal size while the other is thicker. The thicker leaf sits in a mortise pocket machined into the door to assist in accurate alignment and a flush fit. The fixed pins prevent the door from being taken off hinges by driving out pivot pins, which is great if used in an outswing application. Adjustable hinges have an adjustment capability of 1/8” up and down, and 1/8″ side to side.
Hinge Types
There are two types of adjustable hinges: the set hinge and the guide hinge.
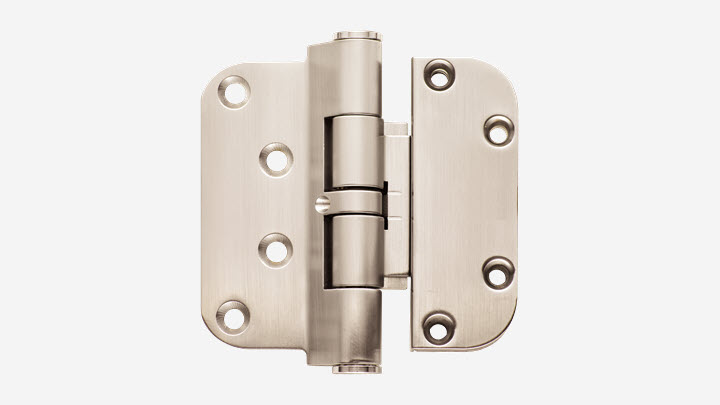
The Set hinge provides the vertical adjustment possibility. The adjustment location of the hinge is under the bottom finial cap.
The Guide hinge provides the horizontal adjustment possibility. The adjustment location of the hinge is on the thicker leaf.
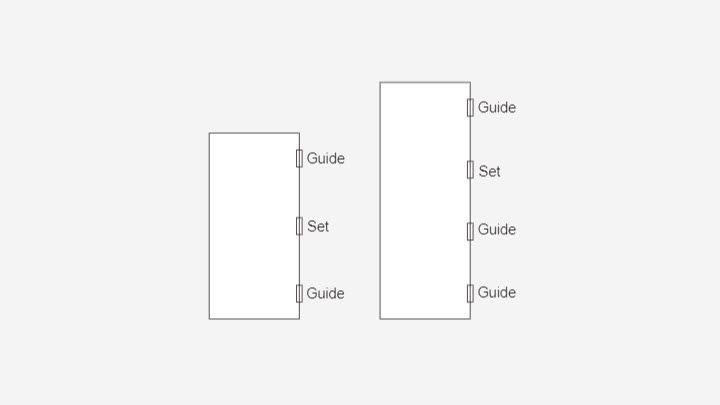
For 6’8” or 7’0” doors, the top and bottom hinges are guide hinges and the middle is the set hinge. For 8’ doors, the set hinge is located the second from the top.
Adjustment
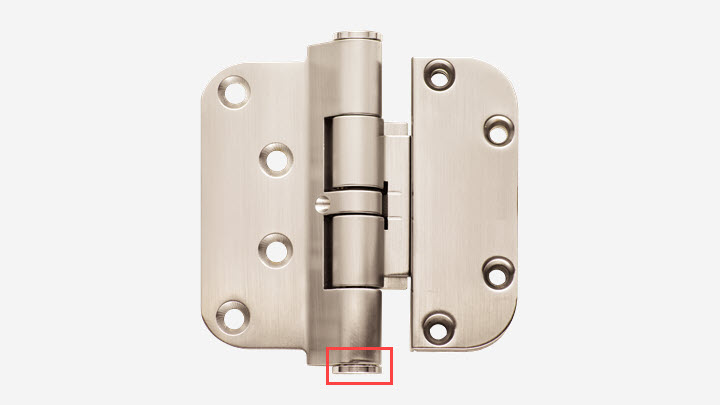
For a vertical adjustment, focus on the set hinge. With the door closed or open, remove the press-fit finial cap from the bottom of the set hinge to expose the adjustment screw. Use a small screwdriver to remove the plastic version of the cap, or use a plastic putty knife to remove the brass version of the cap. Insert the 3/16” hex wrench into the adjustment screw. Turn the screw clockwise to raise the panel and counterclockwise to lower the panel. Reinstall the finial cap.
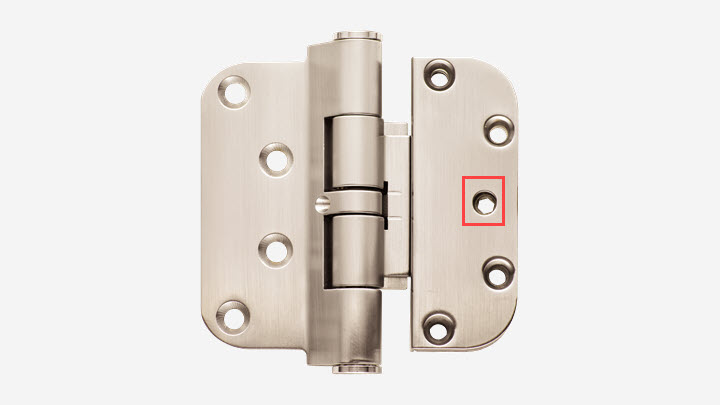
For a horizontal adjustment, focus on the guide hinges. With the door open, insert the 3/16” hex wrench into the horizontal adjustment screw. Turn clockwise to decrease the margin and counterclockwise to increase the margin on the hinge side.